

Install On USB Thumb Drive
USB thumb drives or flash drives are small plastic memory devices that connect to your computer's USB port. You use them to store and retrieve data just like your computer's hard drive. However, unlike your hard drive they are removable and portable. USB thumb drives do not have any moving parts which makes them much more rugged than a hard drive.
When you you purchase a thumb drive, there are two considerations apart from cost:
- The size of the memory
- The speed it can transfer data.
Memory size is measured in giga bytes (GB). Common memory sizes range from 256GB down to 1GB. Currently 8GB and 16GB can be purchased for under $10. Prices will vary depending on what's currently on sale in your neighbourhood.
Memory speed is determined by the type of USB ports on your computer and the design of the thumb drive. For the fastest data transfer speed you need to have a USB 3.0 port on your computer working with a USB 3.0 thumb drive. The most common and cheapest drives are designated USB 2.0. Slower 2.0 devices also work if they are plugged into a USB 3.0 computer port.
Figure 1 shows a typical inexpensive thumb drive. Memory sizes are stamped on the side and a plastic cover protects the USB connector plug. This cap must be used to protect the connector and stored data when the drive is unplugged from the computer.
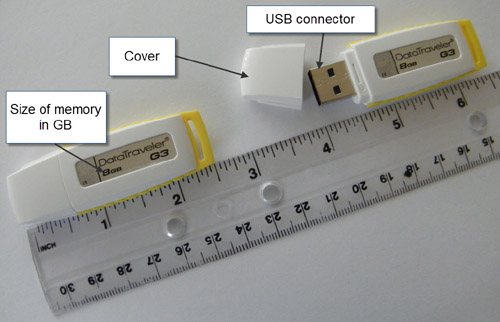
Figure 1 - Typical thumb drive.
To install orbs on a USB thumb drive, complete the following steps:
- Insert the thumb drive into your computer's USB port.
- Open Windows Explorer to locate the thumb drive folder and drive letter.
- Find the orb download file. Note: this is covered in detail elsewhere.
- Use the download file to install the orb on the thumb drive.
- Remove the thumb drive from the computer.
Insert the Drive into a USB Port.
A USB port is socket on your computer which accepts the USB connector plug on the thumb drive. Figure 2 shows two of the USB ports located on the side of a laptop computer. They are typically found on the front or back of personal computers (PC).
Note in Figure 2 that a rectangular plastic connector occupies half of the space inside the USB socket. Your USB thumb drive has a similar plastic connector inside its connector plug. When you insert the plug into the socket the two plastic parts make contact.
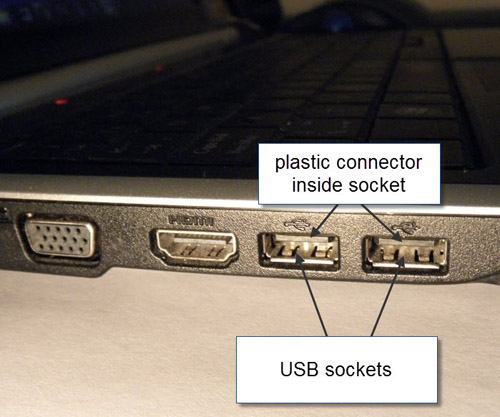
Figure 2 - Laptop USB ports.
- Note where the plastic connector is located inside your computer USB socket. It often occupies the top half of the socket.
- Remove the cap from your USB thumb drive and look down into the plug connector. If the computer socket has the plastic piece at the top, rotate the thumb drive until the plastic inside the plug is on the bottom.
- Gently insert the USB thumb drive connector plug into the USB socket. There should be minimal resistance if the plug is correctly aligned (Figure 3).
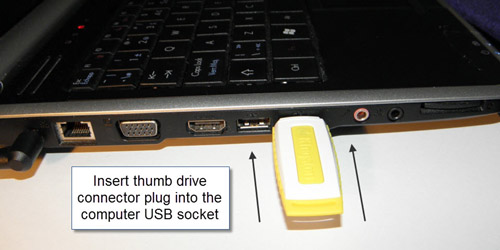
Figure 3 - Thumb drive inserted.
Locate the Drive
When you insert a USB thumb drive into a USB port your computer recognizes it as a drive and assigns it an icon and drive letter. This may take a few minutes to complete. You use Windows Explorer to find the drive letter. You will need the drive letter later on when you run the orb installation setup program.
1) Locate the Windows Start button on your Windows desktop (Figure 4).

Figure 4 - Windows Start button.
2) Place your mouse cursor over the Start button and click once with your right mouse button. You should see the small menu shown in Figure 5.
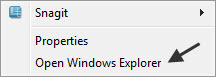
Figure 5 - Open Windows Explorer.
3) Place the mouse cursor on Open Windows Explorer and click once with the left mouse button. Windows Explorer opens in a new window similar that shown in Figure 6.
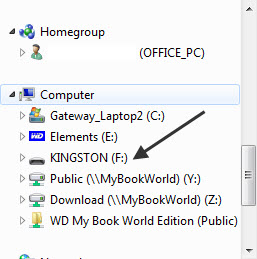
Figure 6 - Locating the drive letter.
4) Use the vertical scroll bar on the left side of the Explorer window to locate the drive under the heading, Computer. Figure 6 shows that Windows refers to this particular drive by the manufacturer's name (KINGSTON) and has assigned F: to its drive letter. The thumb drive is now recognised by Windows and can be used to store, retrieve or run programs just like a computer hard drive.
5) Record the letter Windows has assigned to your thumb drive.
Find the Orb Download
This is covered in detail elsewhere. See the Find the download tech skill.
Use Windows Explorer to locate the orb download. In Figure 7 the latest download of the Love remedy orb has been downloaded and located in the Downloads folder.
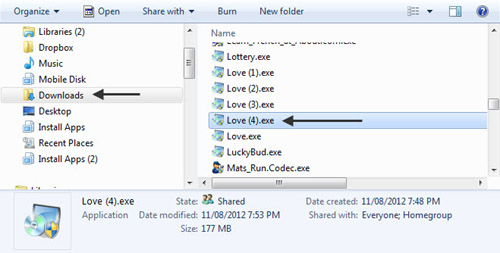
Figure 7 - Orb download location
Install the Orb from the Download
A downloaded orb file has a file name in the format: Orb.exe. An exe type of file is a program which executes when it it is opened. Orb.exe files are programs which install the orb to a drive and folder that you specify during the setup for the installation.
1) Locate the downloaded orb exe file (Figure 7)
2) Place the mouse cursor over the file name and rapidly click twice with the left mouse button.
3) Depending on your Windows security settings, you may now see a user account control warning asking you if you want to allow the program to make changes to the computer. Place your cursor over the Yes button and click once with the left mouse button.
4) The orb setup wizard starts with a Welcome window. Place the mouse cursor on Next and click once with the left mouse button (Figure 8).
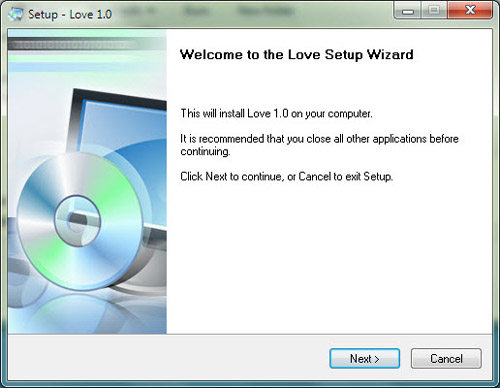
Figure 8 - Setup Welcome screen.
5) The Licence Agreement window now opens. To proceed with the installation, click I accept the agreement using the left mouse button then click Next with the left mouse button (Figure 9).
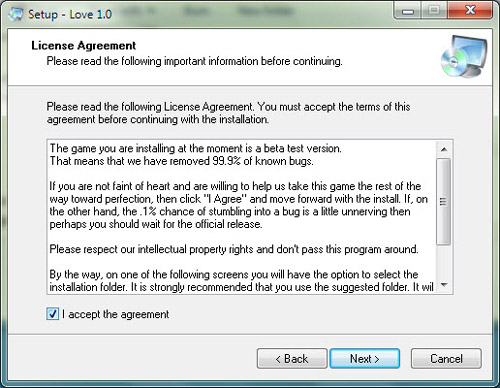
Figure 9 - License Agreement
6) The Select Application Folder window now opens (Figure 10). The destination folder is by default set to C:\goddgames\Orb Name. In this case the Love orb is being installed to C:\goddgames\Love.
7) Change the letter C to the letter Windows assigned to your thumb drive. Delete only the letter C by first placing the mouse cursor immediately to the right of it (Figure 10).
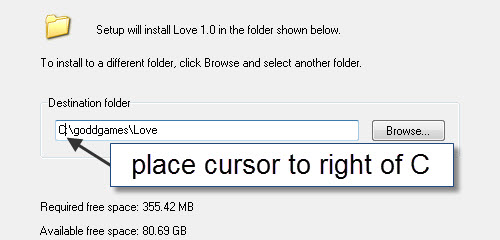
Figure 10 - Select C
8) Next delete the letter C by pressing the backspace key (.) once (Figure 11)
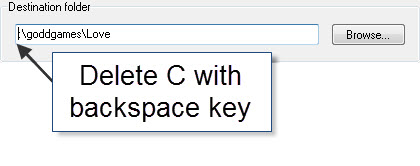
Figure 11 - Delete C
9) Once you have deleted C, type the letter Windows assigned to your thumb drive (Figure 12).
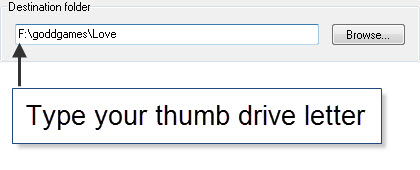
Figure 12 - Type your drive letter.
10) When you have changed the drive letter to correspond to your thumb drive, click Next with your left mouse button. Note: Do not make any other changes to the name of the destination folder. (Figure 13).
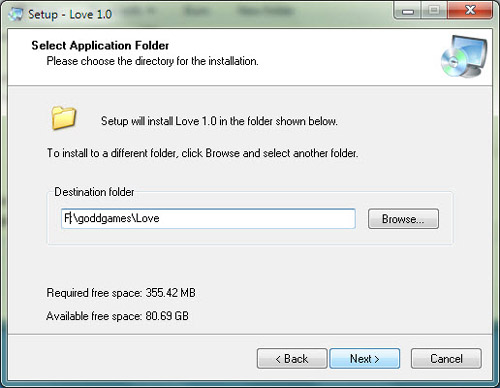
Figure 13 - Finish application folder selection.
11) The Select Programs Menu Folder window now appears (Figure 14).
- Uncheck the Create shortcuts on the Desktop by clicking it using the left mouse button.
- Check the Don't create a Program Group box.
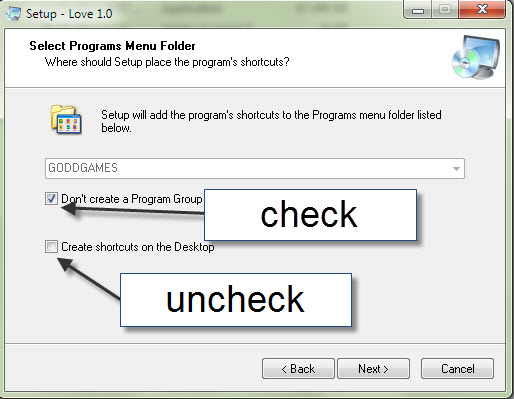
Figure 14 - Deselect shortcuts.
12) The window shown in Figure 15 shows that the program is installing on your thumb drive. This may take several minutes and now is a good time to take a break while you leave the program to install.
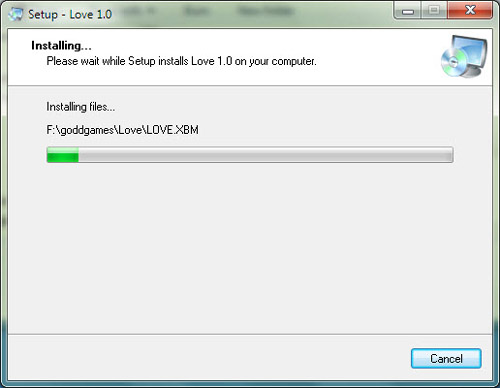
Figure 15 - Installation progress window.
13) After installation, the orb is launched by default when you click Finish. Uncheck the Launch (Orb) box by clicking on it using the left mouse button, to prevent launch. End the installation by clicking on Finish using the left mouse button.
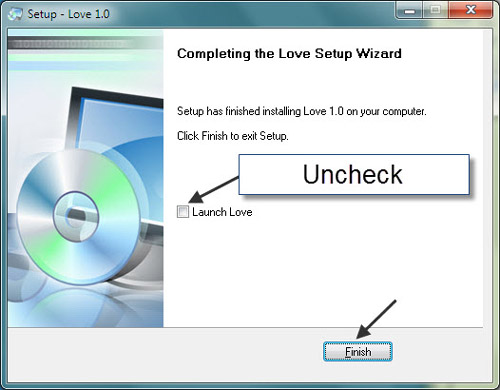
Figure 16 -Finishing the installation.
14) After installing an orb you may see the installation warning shown in Figure 17. It is normally of no concern. Place the cursor on This program installed correctly and click with the left mouse button to close the window.
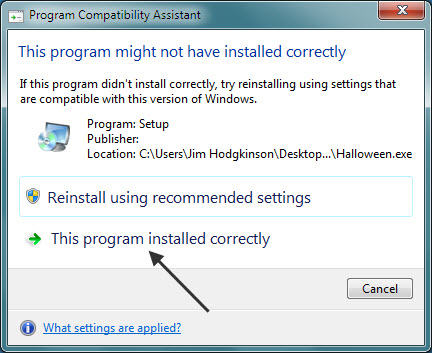
Figure 17 - Installation warning.
Removing the Thumb Drive
It is good practice to allow Windows to safely disconnect before removing USB devices like thumb drives from your computer.
1) Locate the hidden icons triangle on the bottom right side of your desktop (Figure 18) and click it once with the left mouse button.
2) You should see a small window containing different icons. Click on the USB plug icon shown in Figure 18 with either the left or right mouse button.
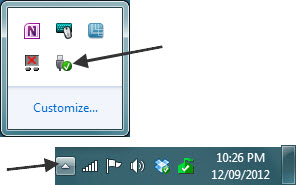
Figure 18 - Safely remove hardware.
3) Figure 19 shows a menu listing the USB devices attached to your computer. Place the mouse cursor over the name of your thumb drive and click with the left mouse button.
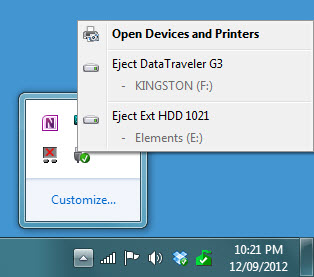
Figure 19 - Select your drive.
4) It is safe to remove your thumb drive when you see the message shown in Figure 20. Remove the thumb drive and replace the cap over the connector.
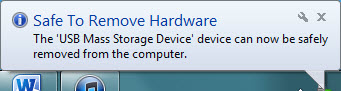
Figure 20 - Safe message.